


Understanding Paver Patio Installation Bay Area
Paver patio installation is a fantastic way to transform your outdoor spaces into beautiful, functional areas for relaxation and entertainment. For homeowners in the Bay Area, where outdoor living is an integral part of life, understanding the nuances of this installation can set the foundation for a successful project. The paver patio installation Bay Area offers both aesthetic appeal and practicality, making it a popular choice among residents. In this guide, we delve into the complexities surrounding this home improvement project, from the essential materials used to common installation techniques.
What Are Paver Patios?
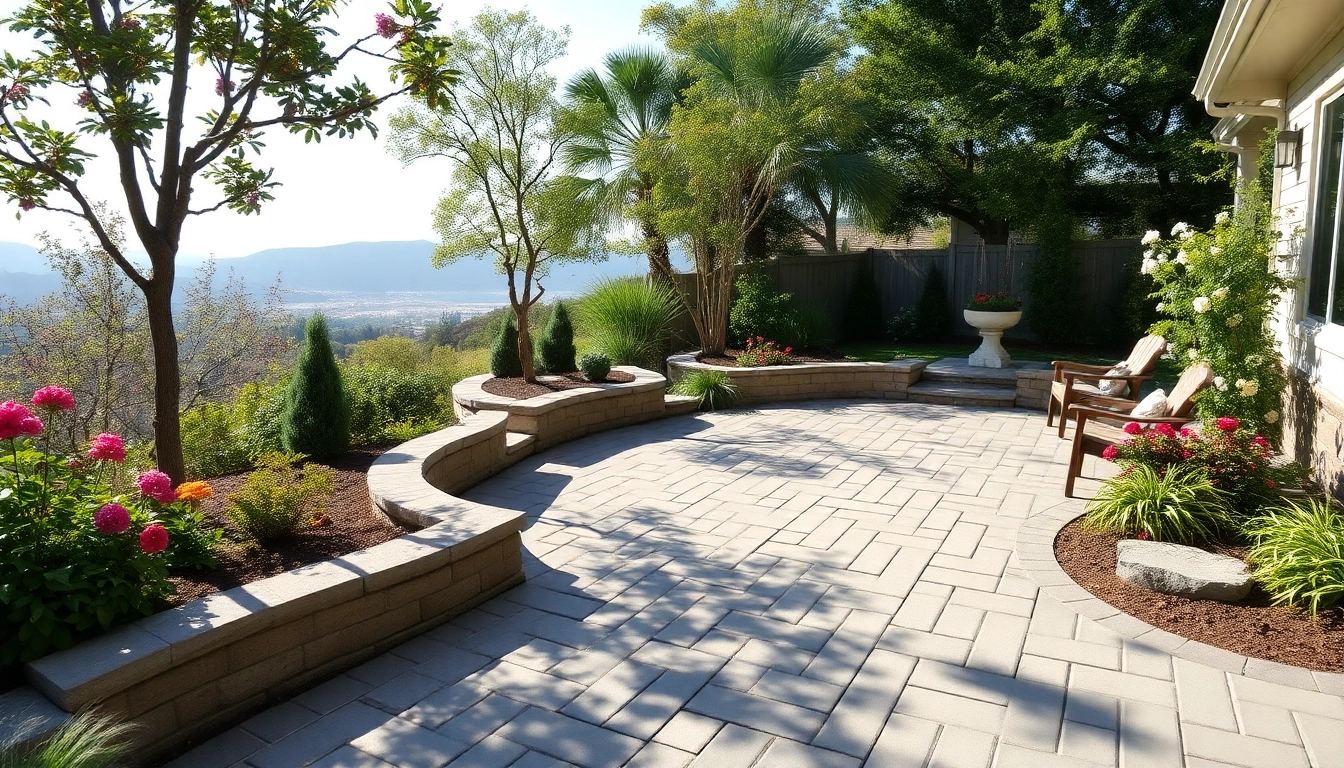
Paver patios are outdoor spaces constructed using individual stone, brick, or concrete units, which are placed together to create a solid and visually appealing surface. Unlike traditional concrete slabs, paver patios offer flexibility in design and can come in a variety of shapes, sizes, and colors, making them customizable to fit any outdoor aesthetic. Their interlocking nature also contributes to their stability and durability, essential for withstanding the various weather conditions prevalent in the Bay Area.
The Benefits of Paver Patios
Paver patios come with numerous advantages that enhance their appeal for homeowners:
- Durability: Pavers are designed to withstand heavy loads and resist cracking due to shifting soil and temperature fluctuations.
- Low Maintenance: Compared to traditional concrete or wood patios, paver patios require minimal upkeep. Regular cleaning and occasional resealing are generally sufficient to keep them looking fresh.
- Design Flexibility: With a wide array of colors, styles, and patterns available, homeowners can create a unique outdoor look that reflects their personal taste.
- Eco-Friendliness: Many pavers are made from recycled materials and allow for water drainage through gaps, reducing runoff and improving groundwater recharge.
- Increased Home Value: A well-installed paver patio provides a beautiful outdoor space that can enhance the overall value of a home.
Common Materials Used in Paver Installation
The materials used for paver patios can vary significantly, each offering distinct aesthetic and practical benefits:
- Concrete Pavers: These are versatile, durable, and cost-effective. They come in various shapes and colors and can mimic the appearance of natural stone.
- Clay Brick Pavers: Known for their timeless looks, clay bricks are fired at high temperatures to create a strong product that can withstand the elements.
- Naturals Stones: Materials like granite, slate, or limestone give a unique look, with each stone presenting different textures and colors. However, they can be more expensive and require more maintenance.
- Permeable Pavers: Designed to allow water infiltration, these are environmentally friendly options that reduce flooding and manage stormwater sustainably.
Planning Your Paver Patio Installation Bay Area
Planning is critical for a successful paver patio installation. The right approach ensures that your project runs smoothly and meets all aesthetic and functional goals.
Choosing the Right Location
Selecting the perfect location for your patio involves considering sunlight, wind patterns, drainage, and accessibility. Ideal spots are usually flat and away from excessive water runoff. Evaluating the layout of existing landscaping and outdoor furniture can help determine the best position to maximize both view and utility.
Design Considerations for Your Patio
Designing your patio is an exciting step but should be approached with careful consideration:
- Size and Shape: The size of your patio should complement the scale of your home and garden. Round, rectangular, or freeform shapes can cater to various aesthetics.
- Functionality: Determine how you will use the space. Will it serve as a dining area, a lounge space, or a spot for outdoor cooking?
- Materials and Colors: Choose materials and colors that harmonize with your house’s style and the surrounding landscape.
- Lighting: Incorporating lighting can extend the usability of the space into the evening hours while enhancing safety and ambiance.
Permits and Regulations in the Bay Area
Before commencing installation, it is imperative to check local regulations and acquire the necessary permits. In the Bay Area, zoning laws vary by municipality, and homeowners may need permits for changes to landscaping or structures. Ensuring compliance will help avoid future complications or fines, as well as ensuring a more seamless installation process.
Step-by-Step Guide to Paver Patio Installation Bay Area
Once planning is complete and all regulations have been met, you can initiate the paver patio installation process. Here’s a step-by-step guide:
Preparing the Site
Preparation is key to successful installation. Here’s how to prepare your site:
- Clear the Area: Remove any grass, plants, or debris from the intended patio space.
- Excavation: Excavate the soil to a minimum depth of 6 to 8 inches to allow for the base materials and pavers.
- Compact the Soil: Use a plate compactor to firm up the soil, which helps prevent settling over time.
Base Layer and Material Selection
The base layer is crucial for the longevity of your paver patio:
- Install a Geotextile Fabric: This helps prevent weed growth and allows for drainage.
- Applying Crushed Stone: Add a layer of crushed stone or gravel for proper drainage. Aim for 4 to 6 inches of material, compacting it for a stable base.
- Sand Layer: Spread a 1-inch layer of coarse sand on top of the crushed stone, ensuring a smooth surface on which to lay the pavers.
Installation Techniques Explained
With your foundation set, it’s time to install the pavers:
- Starting Point: Begin laying your pavers at a corner or edge, using string lines for guidance.
- Interlocking Pattern: Use your chosen pattern, ensuring that the pavers fit tightly together without gaps. Stagger joints to enhance stability.
- Cutting Pavers: Use a wet saw or paver splitter for any cuts needed to fit the patio edges.
- Compacting Pavers: After laying the pavers, use a plate compactor to ensure pavers settle into the sand and lock in place.
- Sand Filling: Spread polymeric sand over the surface and sweep it into the joints to enhance stability and prevent weed growth.
Maintenance Tips for Paver Patios in the Bay Area
To keep your paver patio looking its best and functioning properly, regular maintenance is vital.
Regular Cleaning Practices
Cleaning your patio should be an ongoing activity. Here are some effective practices:
- Power Washing: Use a power washer to remove dirt, algae, and debris without damaging the pavers.
- Spot Cleaning: For stubborn stains, targeted spot cleaning with appropriate equipment and cleaning solutions may be necessary.
Resealing and Repairing Your Patio
To enhance the longevity and appearance of your paver patio:
- Reseal: Re-seal the patio every few years to protect the surface from stains and fading.
- Address Damage: Inspect your patio regularly for damage or shifting and address it promptly to prevent further issues.
Seasonal Maintenance Checklist
A seasonal maintenance regimen can prolong your paver patio’s lifespan:
- Spring: Inspect for winter damage and clear any debris.
- Summer: Regular cleaning and check for weeds.
- Fall: Remove leaves and apply a new layer of sealant if needed.
- Winter: If in a snowy region, avoid salt as it can damage the pavers.
FAQs About Paver Patio Installation Bay Area
How long does a paver patio installation take?
Typically, it takes 2-5 days depending on the patio size and complexity.
What is the cost range for paver patio installation?
Costs usually range from $10 to $30 per square foot, depending on material choice.
Can I install a paver patio myself?
Yes, but professional installation ensures quality and longevity of the patio.
What maintenance do paver patios require?
Regular cleaning, resealing, and checking for settling or shifting are essential.
Are paver patios environmentally friendly?
Yes, they allow water drainage and can be made from recycled materials.


More Stories
Residential Roofing: Essential Innovations Then vs Now in 2026
The Bedroom Apartment for Sale Westlands Nairobi Roadmap: Essential Insights for First-Time Buyers in 2026
Enhancing Home Comfort with American Standard Furnace Canada